I assume you have compiled OpenCV 2.4.10 library with GPU support from the last tutorial or install OpenCV 2.4.10 in your machine. We will use Visual Studio 2010 C++ or any Visual Studio C++ you have. Before starting, you need to configure your Visual Studio project to know where you put OpenCV or additional library such as CUDA, OpenNI, and PrimeSense NITE.
- CUDA is required for OpenCV GPU module (you can ignore it if you do not have NVidia graphics card in your machine).
- OpenNI and PrimeSense NITE are required for ASUS XTion Pro Live and Kinect (you can ignore it if you do not have ASUS XTion Pro Live or Kinect).
So CUDA, OpenNI, and PrimeSense NITE act as additional requirement and can be ignored if you don’t need them. Here is the configuration:
Create Empty Project in Visual Studio
- Open Visual Studio 2010.
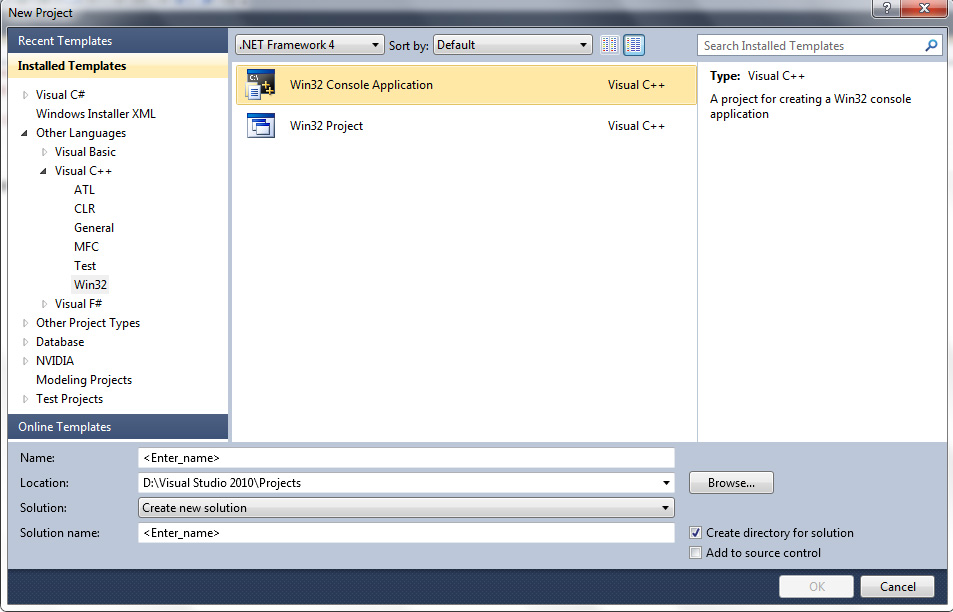
- Create a C++ project and select Win32 console application.
- Give a name to the project (without space or characters) then click OK.
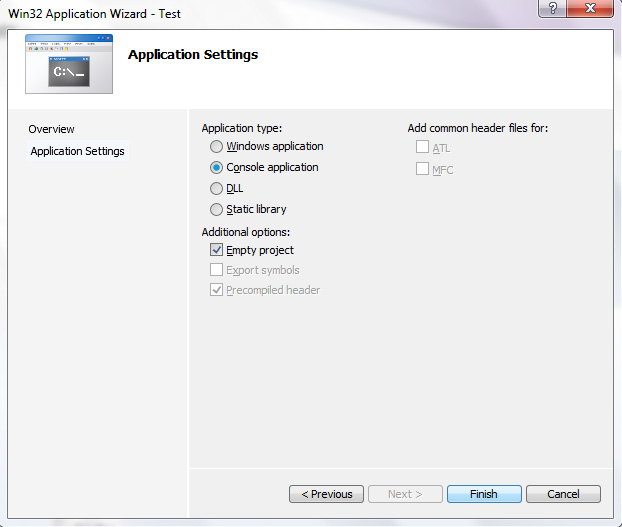
- Click Next — select Console Application — check Empty project — click Finish.
- Now you are done creating empty project in Visual C++.
Create New File in Visual Studio
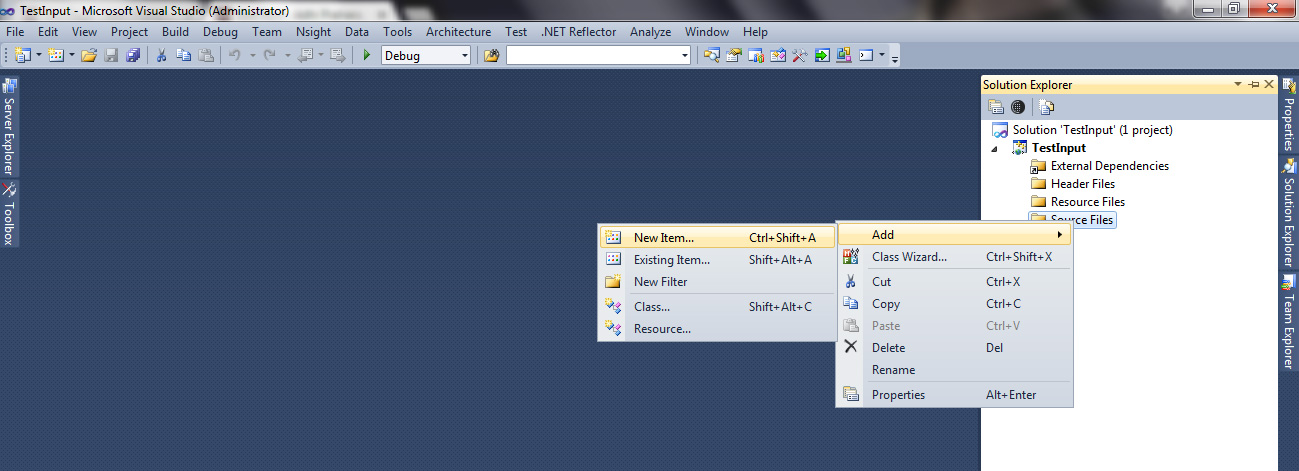
- Go to Solution Explorer — Source Files — Right click — Add — New Item.
- Select C++ File (.cpp) file then give it a name — click Add
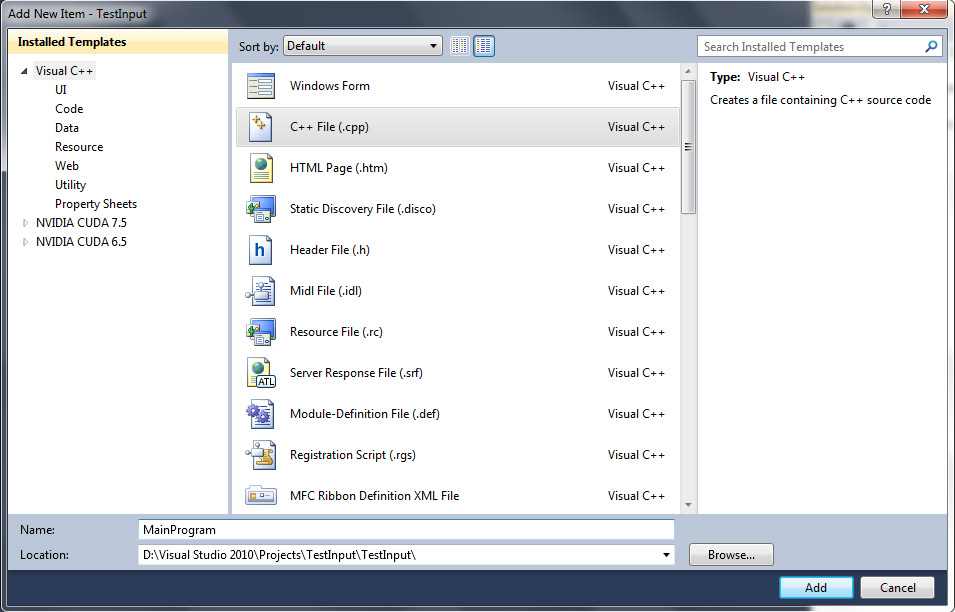
- Now you get a .cpp file in your project. The Source Files is a folder where you put all your .cpp / .c / .cu files and the Header Files is a folder where you put all your .h / .hpp / .cuh files
Configure Visual Studio with OpenCV
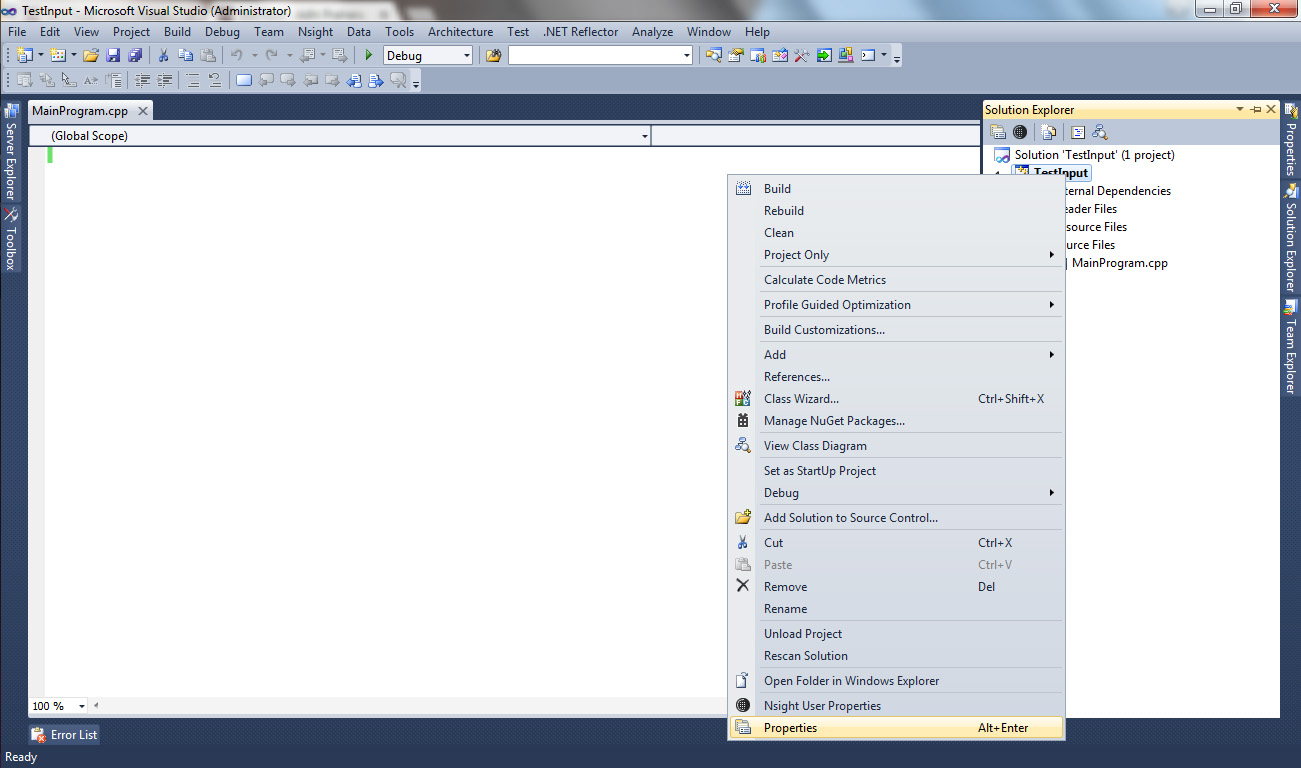
- Go to properties of your project by right click in the project name and choose Properties.
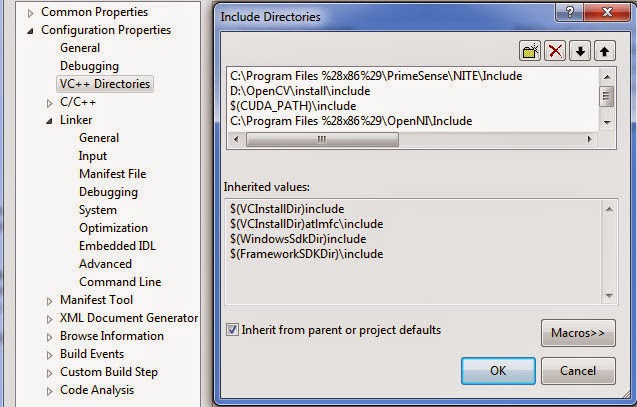
- In VC++ Directories — Include Directories, put the path of your OpenCV include directory. Do the same thing for Debug and Release mode. Here is the preview of my setting [You can ignore the PrimeSense NITE, CUDA and OpenNI path if you don’t need it] :
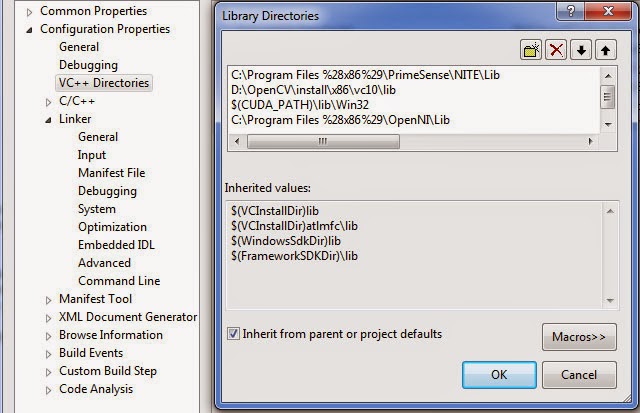
- In VC++ Directories — Library Directories, put the path of your OpenCV library directory. Do the same thing for Debug and Release mode. Here is the preview of my setting [Again you can ignore the PrimeSense NITE, CUDA and OpenNI path if you don’t need it] :
- In Linker — Input — Additional Dependencies, put all the library names from OpenCV. If you are in Debug mode then copy these OpenCV libraries [Note that this is for OpenCV 2.4.10 so if you have different version of OpenCV, just look in the path of your OpenCV library directory]:
opencv_calib3d2410d.lib
opencv_contrib2410d.lib
opencv_core2410d.lib
opencv_features2d2410d.lib
opencv_flann2410d.lib
opencv_gpu2410d.lib
opencv_highgui2410d.lib
opencv_imgproc2410d.lib
opencv_legacy2410d.lib
opencv_ml2410d.lib
opencv_nonfree2410d.lib
opencv_objdetect2410d.lib
opencv_photo2410d.lib
opencv_stitching2410d.lib
opencv_ts2410d.lib
opencv_video2410d.lib
opencv_videostab2410d.lib
If you are using CUDA and OpenNI, you need to copy these CUDA and OpenNI libraries as well [Again this is optional]:
cudart.lib
openNI.lib
If you are in Release mode then copy these OpenCV libraries [Note that this is for OpenCV 2.4.10 so if you have different version of OpenCV, just look in the path of your OpenCV library directory]:
opencv_calib3d2410.lib
opencv_contrib2410.lib
opencv_core2410.lib
opencv_features2d2410.lib
opencv_flann2410.lib
opencv_gpu2410.lib
opencv_highgui2410.lib
opencv_imgproc2410.lib
opencv_legacy2410.lib
opencv_ml2410.lib
opencv_nonfree2410.lib
opencv_objdetect2410.lib
opencv_photo2410.lib
opencv_stitching2410.lib
opencv_ts2410.lib
opencv_video2410.lib
opencv_videostab2410.lib
Again if you use CUDA and OpenNI, you need to copy these CUDA and OpenNI libraries [Again this is optional]:
cudart.lib
openNI.lib
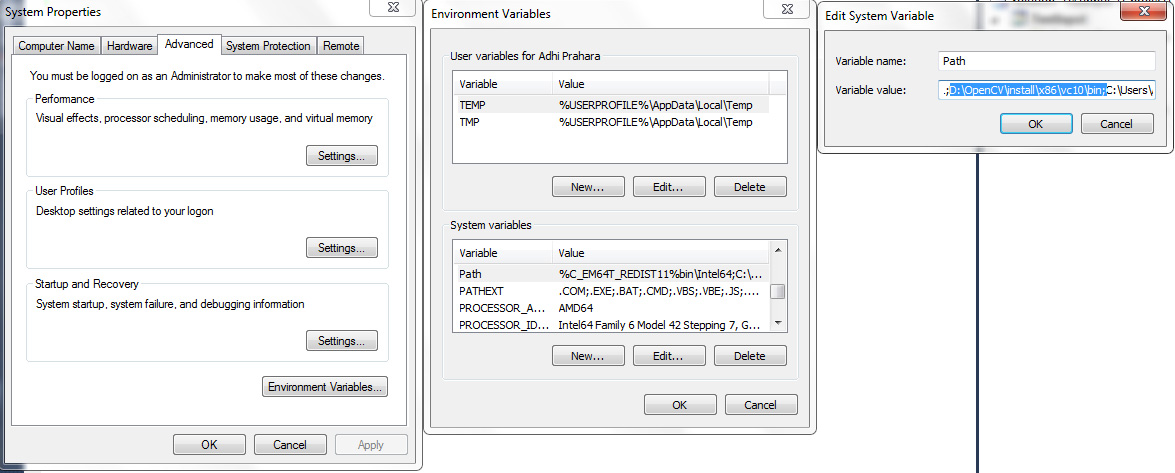
- Last step, add OpenCV binary (bin folder) by Right click in My Computer — Properties — Advanced System Setting — Environment Variables — Path — add your path to OpenCV bin folder
- Or the simple way is just copy all the .dll inside OpenCV bin folder to your Output project (where your .exe generated).
- Again if you use CUDA and OpenNI, you need to add their bin folder to the environment path too.
Done! Now you are good to go to the coding step!