This tutorial will explain on how to grab frames from IP Camera and Kinect or Xtion Pro Live.
Read IP Camera
Prepare a router and an IP camera. See how to configure your IP camera to connect to your already-connected internet-router via wireless and access that IP camera via wireless public IP here.
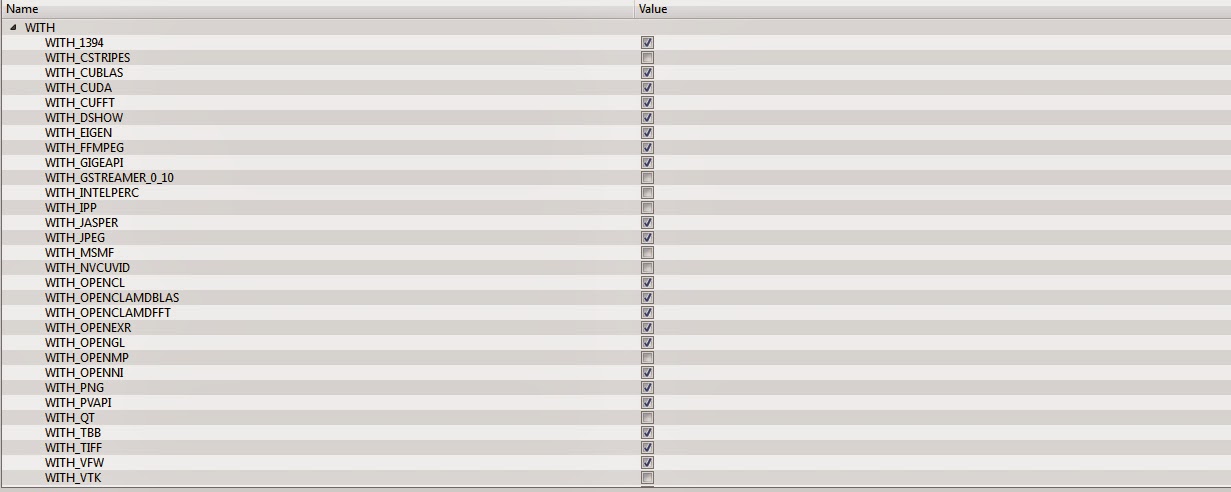
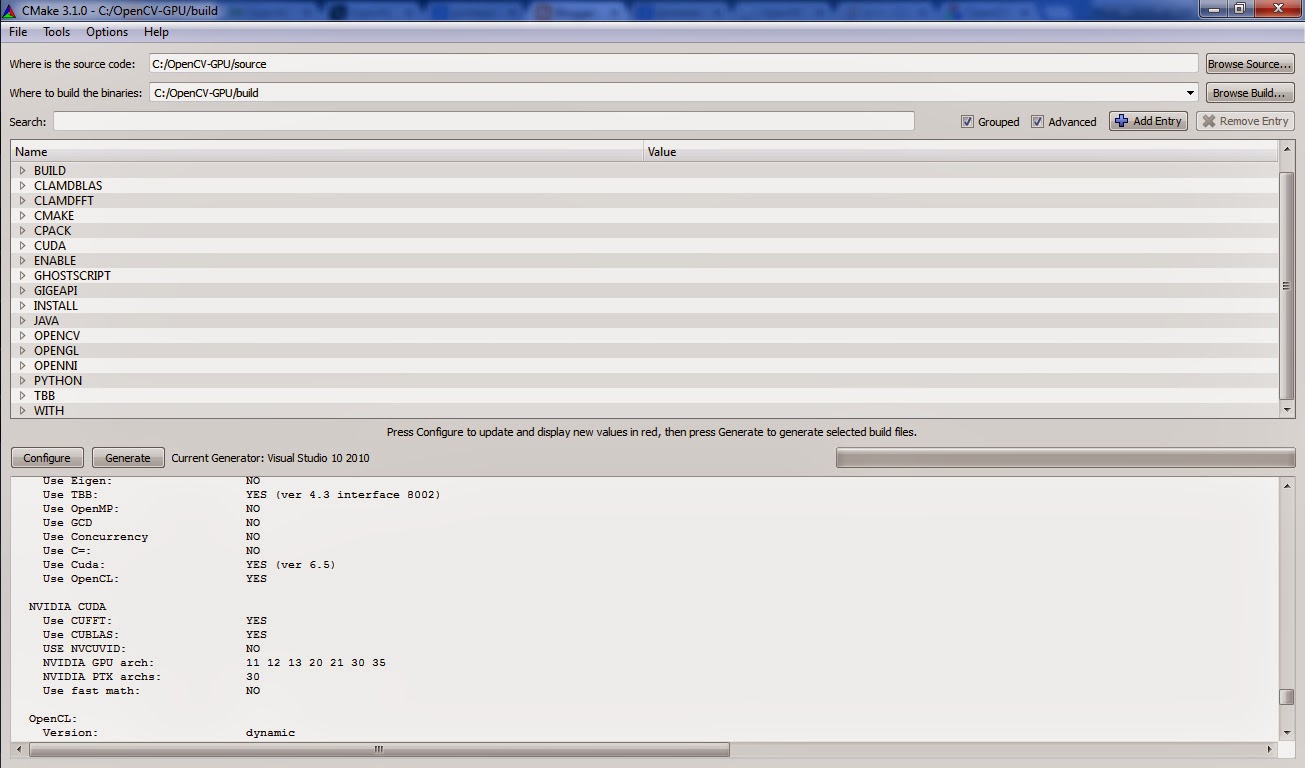
To access IP camera using OpenCV we’ll need to compile OpenCV with ffmpeg codec support because we will stream mjpg type data. The code similar with opening webcam but with different address. Remember to delete ?mute in <ipcameraaddress>/video.mjpg?mute because OpenCV only accept video streaming.
int main(int argc, char** argv)
{
VideoCapture ipcam;
Mat frame;
bool status;
// the address format is
// http://<user>:<password>@<ipaddress>:<port>/video.mjpg
// example with my ip camera connected to internet via EVDO-router
// http://admin:admin@10.241.126.66:3333/video.mjpg
//
// Find your ip camera address :
// 1. Open your ip camera on chrome,
// 2. Right click on the streaming video – select inspect element.
// 3. There your address revealed
// 4. You need to add your username and password to access ip camera
// 5. The format is just like the given format above
ipcam.open(“http://admin:admin@10.241.126.66:3333/video.mjpg“);
if (ipcam.isOpened())
{
int keyCode = 1;
// we can choose the size of captured frame
// set frame width to 640
ipcam.set(CV_CAP_PROP_FRAME_WIDTH, 640);
// set frame height to 480
ipcam.set(CV_CAP_PROP_FRAME_HEIGHT, 480);
// stop ipcam capture if keyboard ‘space’ pressed
while (keyCode != 32)
{
// grab frame from streaming video
ipcam >> frame;
if (frame.empty() == false)
{
imshow(“Preview IP-Cam”, frame); // show frame
keyCode = cvWaitKey(1);
}
}
}
// don’t forget to release after it is not used
frame.release();
ipcam.release();
return 0;
}
Read Kinect / Asus XTion Pro Live
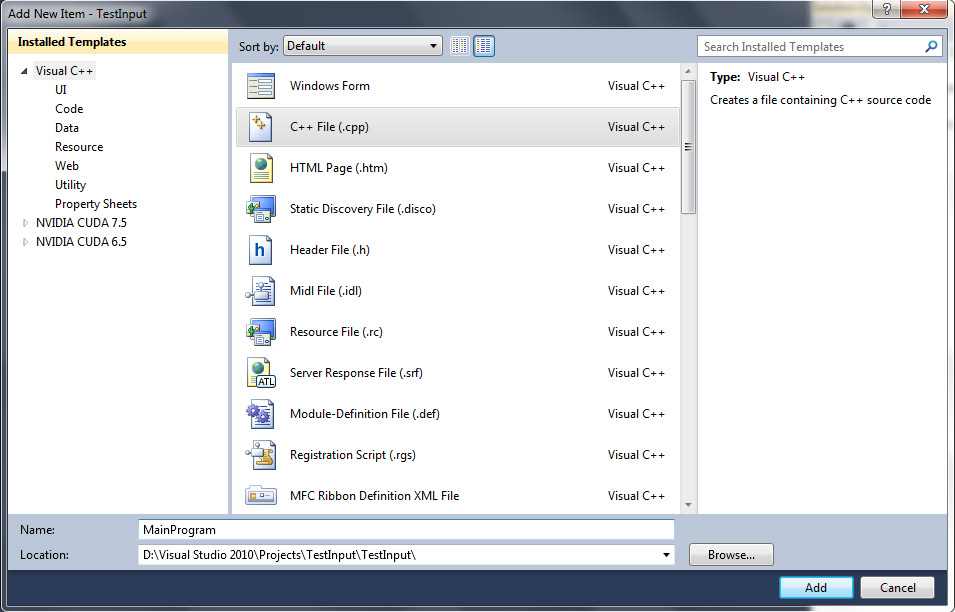
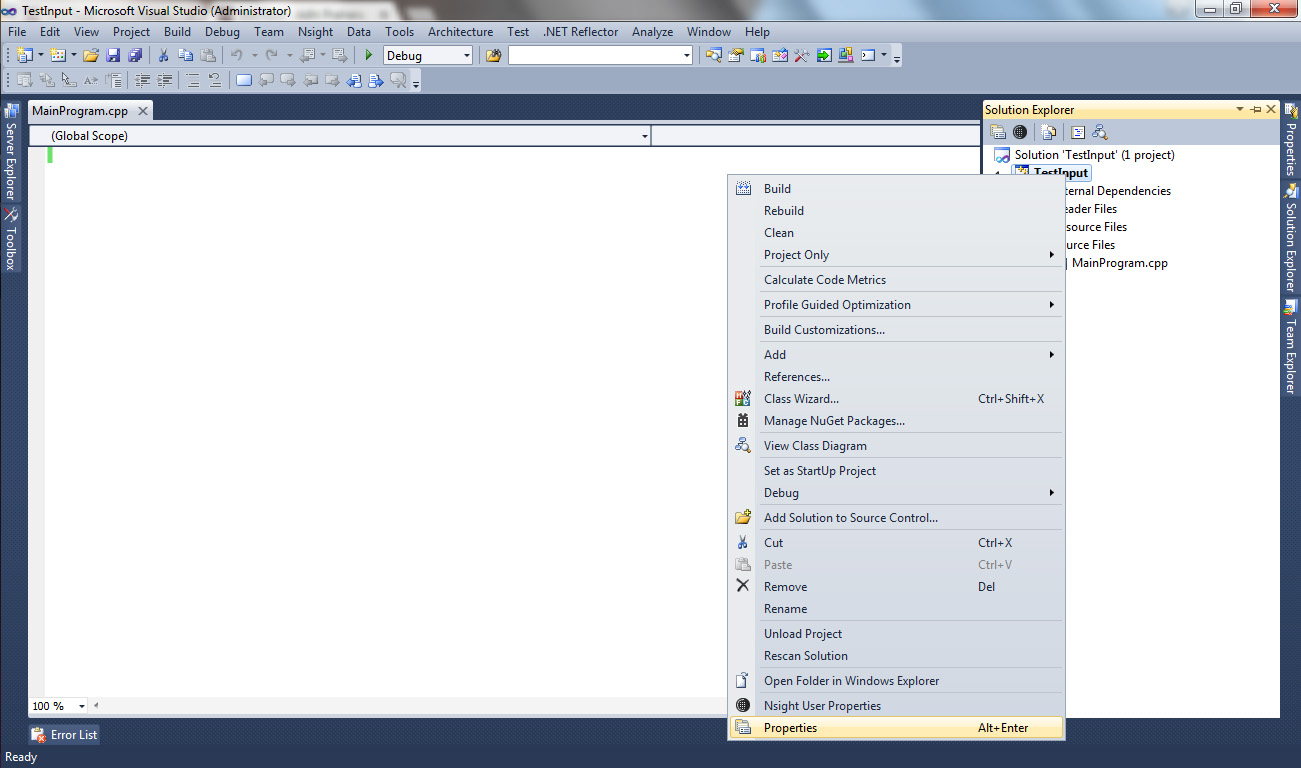
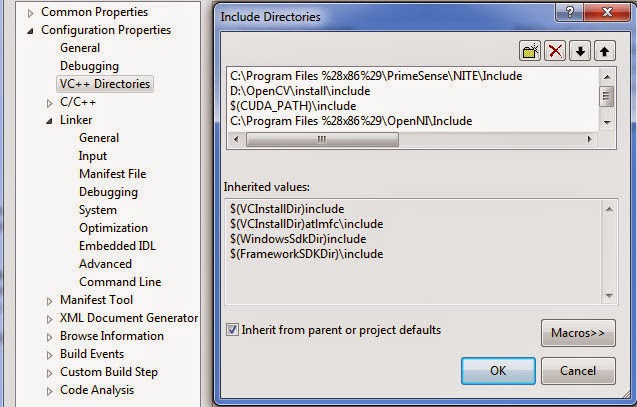
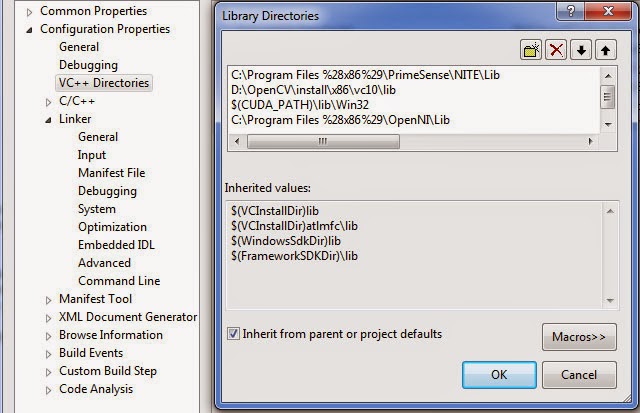
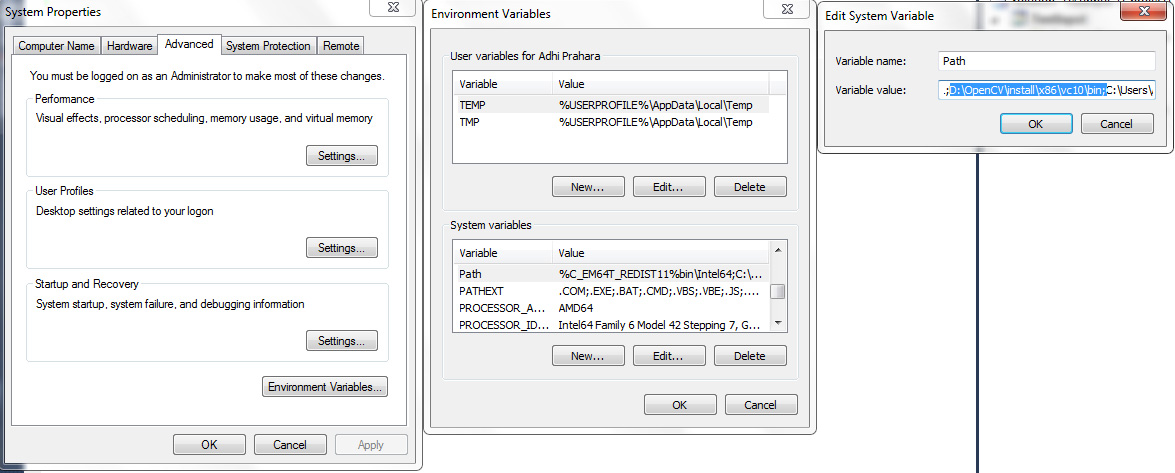
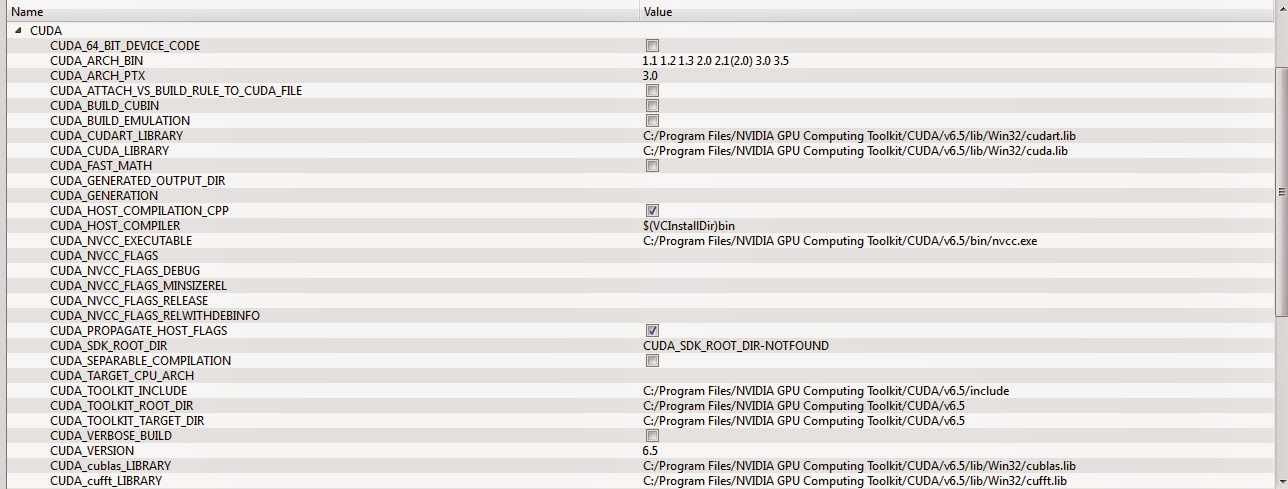
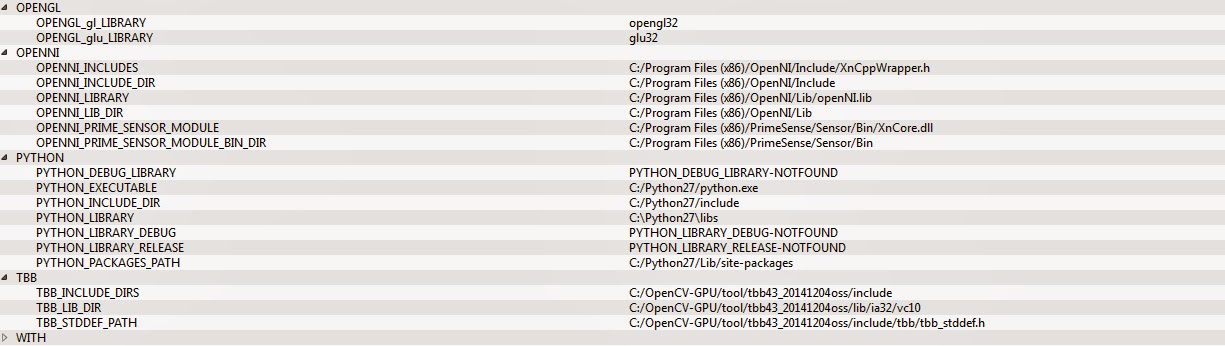
I assume you already have OpenNI, PrimeSense NITE installed in your system and read about configuring Visual Studio 2010 with OpenCV, OpenNI, PrimeSense, and CUDA here. I didn’t use OpenCV to stream Asus XTion Pro Live RGB-D, but I will converted that stream to OpenCV Mat so I can manipulate further with that input. You can find these code from OpenNI samples but they will use OpenGL to view the stream. You can use OpenNI with OpenCV if you compile OpenCV with WITH_OPENNI flag checked.
These are the header that will be used:
#include <Windows.h>
#include <XnCppWrapper.h>
#include <XnPropNames.h>
#include <opencv2\opencv.hpp>
using namespace cv;
using namespace xn;
These are variables that will be used:
enum StreamMode // streaming mode
{
DUAL_SENSOR,
OVERLAY_SENSOR
};
Context context; // create context
XnStatus statusRet; // status for an operation
XnMapOutputMode outputMode; // setting output mode
float* depthHist; // histogram depth
XnDepthPixel depthZRes; // depth-Z
DepthGenerator depthMap; // depth generator
DepthMetaData depthData; // depth metadata
XnRGB24Pixel* texMap; // texture map
unsigned int texMapX = 0; // X-size texture map
unsigned int texMapY = 0; // Y-size texture map
ImageGenerator colorMap; // color generator
ImageMetaData colorData; // color metadata
int streamFPS; // streaming FPS
Size streamSize; // size streaming
// OpenCV Mat that contain depth and color pixel matrix
Mat depthFrame, colorFrame, overlayFrame;
Function to draw overlay RGB-D with accumulative histogram
void DrawOverlay(DepthMetaData &data)
{
const XnDepthPixel* depthBuff = data.Data();
texMapX = (unsigned short)data.FullXRes();
texMapY = (unsigned short)data.FullYRes();
depthZRes = data.ZRes();
depthHist = (float*)malloc(depthZRes * sizeof(float));
// create accumulative histogram from depth
unsigned int nValue = 0;
unsigned int numPoints = 0;
memset(depthHist, 0, depthZRes * sizeof(float));
for (XnUInt y = 0; y < data.YRes(); ++y)
{
for (XnUInt x = 0; x < data.XRes(); ++x)
{
nValue = *depthBuff;
if (nValue != 0)
{
++depthHist[nValue];
++numPoints;
}
++depthBuff;
}
}
for (int nIndex=1; nIndex < depthZRes; nIndex++)
depthHist[nIndex] += depthHist[nIndex-1];
if (numPoints)
{
for (int nIndex=1; nIndex < depthZRes; nIndex++)
depthHist[nIndex] = (unsigned int)(256 * (1.0f – (depthHist[nIndex] / numPoints)));
}
// create texture map
memset(texMap, 0, texMapX * texMapY * sizeof(XnRGB24Pixel));
const XnDepthPixel* pDepthRow = data.Data();
XnRGB24Pixel* pTexRow = texMap + data.YOffset() * texMapX;
for (XnUInt y = 0; y < data.YRes(); ++y)
{
const XnDepthPixel* pDepth = pDepthRow;
XnRGB24Pixel* pTex = pTexRow + data.XOffset();
for (XnUInt x = 0; x < data.XRes(); ++x, ++pDepth, ++pTex)
{
if (*pDepth != 0)
{
int nHistValue = depthHist[*pDepth];
pTex->nRed = nHistValue;
pTex->nGreen = nHistValue;
pTex->nBlue = 0;
}
}
pDepthRow += data.XRes();
pTexRow += texMapX;
}
delete(depthHist);
}
Function to capture stream RGB, Depth sensor and Overlay RGB-D:
XnStatus CaptureStream(int mode)
{
statusRet = context.WaitAnyUpdateAll();
if (statusRet == XN_STATUS_OK)
{
switch (mode)
{
// Read dual RGB-Depth Sensor
case 0:
// Depth
depthMap.GetMetaData(depthData);
const XnDepthPixel* depthBuff = depthMap.GetDepthMap();
depthFrame.create(depthData.FullYRes(), depthData.FullXRes(), CV_16UC1);
memcpy(depthFrame.data, depthBuff, depthData.FullYRes() *
depthData.FullXRes() * sizeof(XnDepthPixel));
// RGB
colorMap.GetMetaData(colorData);
const XnRGB24Pixel* colorBuff = colorMap.GetRGB24ImageMap();
colorFrame.create(colorData.FullYRes(), colorData.FullXRes(), CV_8UC3);
memcpy(colorFrame.data, colorBuff, colorData.FullYRes() *
colorData.FullXRes() * sizeof(XnRGB24Pixel));
cvtColor(colorFrame, colorFrame, CV_RGB2BGR);
break;
// Overlay RGB-Depth Sensor
case 1:
depthMap.GetMetaData(depthData);
colorMap.GetMetaData(colorData);
DrawOverlay(depthData);
overlayFrame.create(texMapY, texMapX, CV_8UC3);
memcpy(overlayFrame.data, texMap, texMapY * texMapX * sizeof(XnRGB24Pixel));
cvtColor(overlayFrame, overlayFrame, CV_RGB2BGR);
break;
}
}
return statusRet;
}
Main program:
Just press “1” or “2” to change streaming mode dual RGB&Depth – Overlay
Press “space” to exit program
int main(int argc, char** argv)
{
outputMode.nFPS = 30; // set fps to 30
outputMode.nXRes = 640; // set frame width
outputMode.nYRes = 480; // set frame height
int cIdxGen = DUAL_SENSOR; // default view dual RGB-Depth
int pIdxGen = cIdxGen;
statusRet = context.Init(); // initialize openni
context.SetGlobalMirror(true); // mirror output stream
if (statusRet == XN_STATUS_OK)
{
statusRet = depthMap.Create(context); // create depth map
statusRet = colorMap.Create(context); // create color map
// set output stream from each sensor to our settings
statusRet = colorMap.SetMapOutputMode(outputMode);
statusRet = depthMap.SetMapOutputMode(outputMode);
// begin to stream
statusRet = context.StartGeneratingAll();
if (statusRet == XN_STATUS_OK)
{
texMap = new XnRGB24Pixel[outputMode.nXRes*outputMode.nYRes];
while (true)
{
if (CaptureStream(cIdxGen) == XN_STATUS_OK)
{
switch (cIdxGen)
{
case 0:
imshow(“Depth Sensor”, depthFrame);
imshow(“RGB Sensor”, colorFrame);
break;
case 1:
imshow(“Overlay Sensor”, overlayFrame);
break;
}
char key = cvWaitKey(10);
if (key == 49) // keyboard “1” pressed
cIdxGen = DUAL_SENSOR;
else if (key == 50) // keyboard “2” pressed
cIdxGen = OVERLAY_SENSOR;
else if (key == 32) // keyboard “space” pressed
break;
if (pIdxGen != cIdxGen)
pIdxGen = cIdxGen;
}
}
}
}
else
MessageBox(NULL, L“Failed to initialize OpenNI!”, L“Error!”, 0);
}
// release all unused created memory
depthMap.Release(); colorMap.Release(); userMap.Release();
depthFrame.release(); colorFrame.release();
overlayFrame.release(); userFrame.release();
context.Shutdown();
return 0;
}
You can do the same to get streaming from Infra Red sensor