There are lots of library for computer vision but I choose to use OpenCV. You can get OpenCV anywhere just google it. You can choose easy install (the .exe one) or build from source. I prefer .exe one but there is a problem, it is not support GPU. So we need to compile OpenCV 2.4.10 myself. You must have NVidia driver that support CUDA and Visual Studio 2010 or later. Fortunately, my notebook has GeForce GT540M 2GB.
Here is the step:
- Download and install OpenCV 2.4.10 source from OpenCV website. If you already download the .exe then extract it, look at the installation folder there are folder called source. You can use that to build OpenCV just like I did.
- Download and install CMake, I use CMake 3.1.0.
- Download and install NVidia CUDA Toolkit 6.5 from NVidia website.
- Download and install OpenGL, OPENNI and TBB.
- Download Python from Python website.
Now your preparation is completed, the rest are the installation steps.
How to build OpenCV with GPU support?
First you need to configure CMake. Here is the steps :
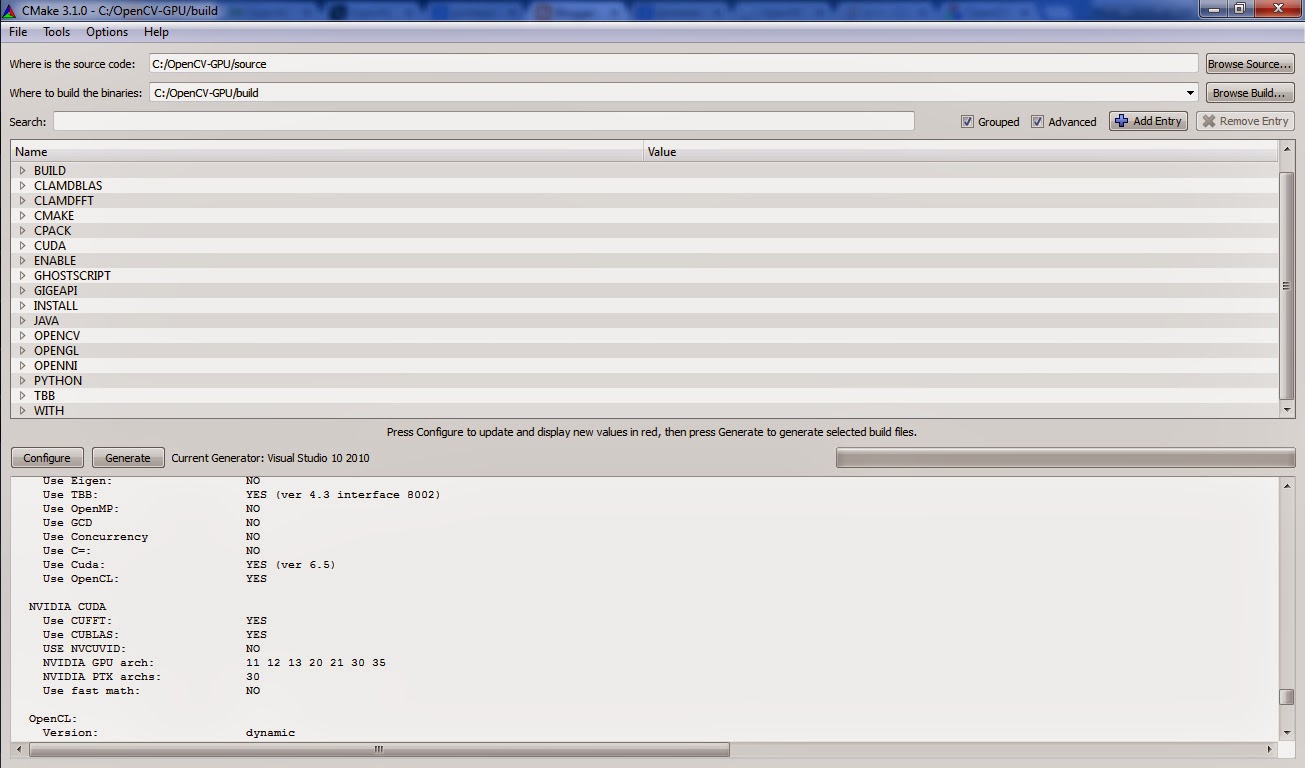
- Open CMake and set CMake source to OpenCV source location.
- Set CMake build to empty folder where you build the source.
- Check the grouped and advanced checkbox. The setting just like this preview.

- Click configure, it will redirect you to select compiler. I choose Visual Studio 2010 (32bit).
- Select specify native compiler then click next.
- Browse for cl.exe in Visual Studio 10.0/VC/bin/cl.exe, fill in for C and C++ compiler, click finish. You will see many red lines there but don’t be affraid you’ve done nothing wrong.
You just done configuring CMake. Now you need to change some of these configuration.
- Leave the Ungrouped Entries, BUILD, CLAMDBLAS, CLAMDFFT, CMAKE, CPACK as it is.
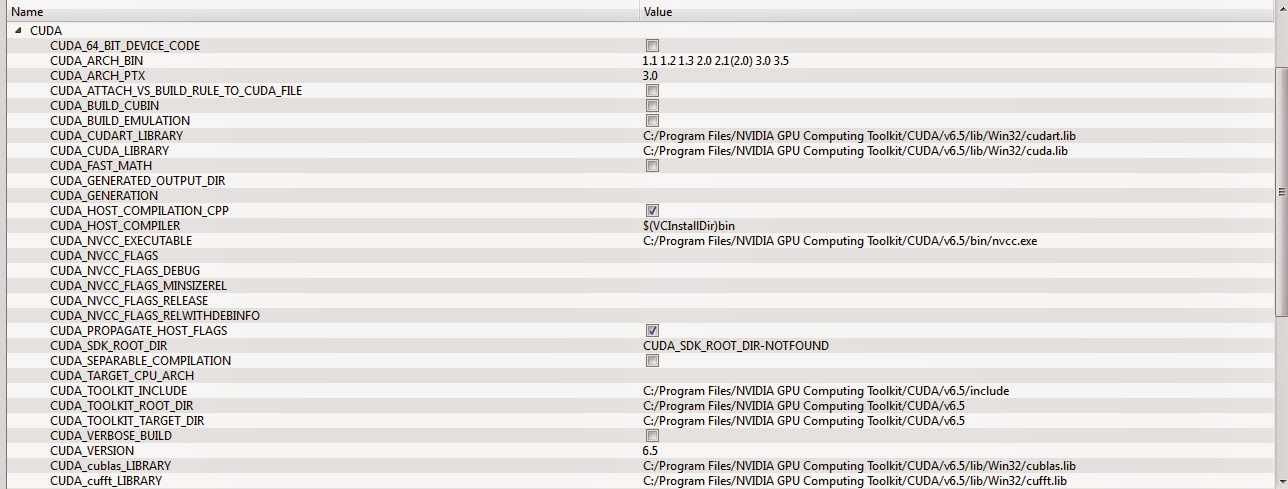
- Expand the CUDA group, there are some entry that already checked by default but you need to unchecked CUDA_ATTACH_VS_BUILD_RULE_TO_CUDA_FILE.
- Leave the ENABLE, GHOSTSCRIPT, GIGEAPI, INSTALL, JAVA, OPENCV as it is but make sure ENABLE_SOLUTION_FOLDERS checked.
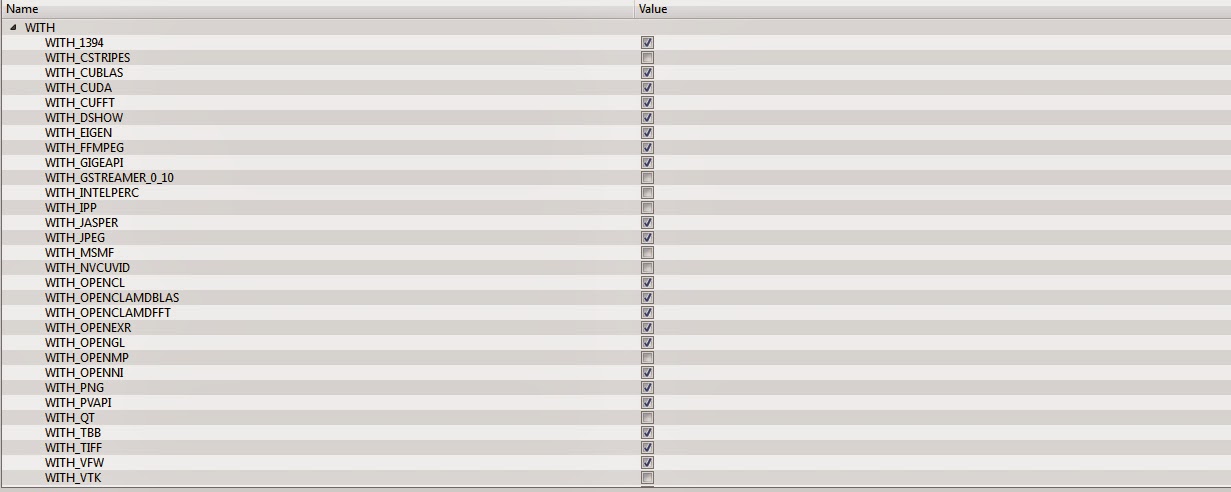
- Expand the WITH group, there are some entry that already checked by default. You need to check WITH_CUBLAS, WITH_CUDA, WITH_OPENGL, WITH_OPENNI, WITH_TBB.
- Click configure to update the configuration.
- Expand the OPENGL, OPENNI, PYTHON and TBB group. You need to fix the location of NOT-FOUND folder such as include and libs folder to their right path where you install them.
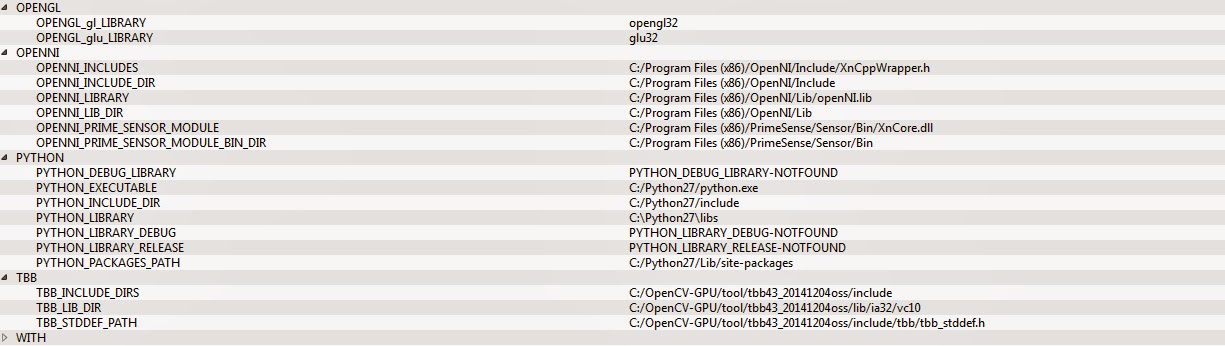
- After every folder path / location correct, click configure to update the configuration.
- Now you should not see any red lines left like this preview. If you still seeing red lines just check it and fix the wrong path until it is right.
Build OpenCV
- Click generate and wait the process to finish.
- Go to the build folder you’ve created before, look for OpenCV.sln.
- Open it on Visual Studio and set to VS2010 to Debug mode.
- This solution contain many projects just select project with name ALL_BUILD then click build. It will build all the project for you.
- Just click NO if pops up from Visual Studio appeared.
- Take a coffee because it will take long time to finish and hopefully without any errors.
- After all build done without error, select project named INSTALL then build it.
- That will generate install folder in build folder that contain necessary include, bin and lib folder for your OpenCV project.
- Do the same for Release mode.
Now, you finish all the hard work and you have compiled OpenCV with GPU support.